

How to Make Burp Cloths from Flannel
To make burp cloths from flannel, cut two rectangular pieces of flannel fabric, approximately 10 by 18 inches in size. Stack the fabric pieces with the right sides facing each other, and sew along the edges, leaving a small opening.
Turn the cloth right side out, and sew the opening closed. Flannel burp cloths are a practical and essential item to have when caring for a newborn. These soft and absorbent cloths provide a convenient way to clean up baby’s spills and spit-ups.
Making your burp cloths from flannel is a simple and cost-effective DIY project that allows you to customize the fabric and design. We will guide you through the process of creating burp cloths from flannel fabric, providing you with step-by-step instructions to ensure success. Whether you are a novice crafter or a seasoned DIY enthusiast, this tutorial will help you make adorable and functional burp cloths that will make caring for your little one a breeze.
Selecting The Right Flannel
Credit: feltmagnet.com
Preparing The Fabric
To prepare the fabric for making burp cloths from flannel, start by washing and drying the fabric to pre-shrink it. Then, iron the fabric to ensure it’s smooth and ready for cutting and sewing. This helps to prevent any shrinkage or distortion in the finished burp cloths.
Pre-wash The Flannel
Before you begin making burp cloths from flannel, it’s important to pre-wash the fabric. This step ensures that any shrinkage or bleeding of colors happens before you cut and sew the clothes, preventing any unwanted surprises later on.
Here’s how to pre-wash the flannel:
- Separate the flannel from any other fabrics and sort them by color to avoid color bleeding.
- Set your washing machine to a gentle cycle with cold water.
- Add a mild detergent to the machine. Avoid using fabric softeners or bleach, as they can affect the absorbency of the burp cloths.
- Place the flannel in the machine and let it run through a complete wash cycle.
- Once the wash cycle is complete, transfer the flannel to the dryer and tumble dry on a low or medium heat setting.
Ironing The Fabric
Ironing the flannel fabric is an essential step to ensure a smooth and neat appearance for your burp cloths. It also helps in reducing wrinkles and making the fabric easier to work with when cutting and sewing.
Follow these steps for ironing the fabric:
- Set up your ironing board and turn on the iron to the appropriate heat setting for the flannel fabric.
- Place a damp cloth or press cloth over the flannel to prevent direct heat contact.
- Gently press the iron onto the cloth, moving it in a back-and-forth motion. Avoid applying too much pressure as it may stretch the fabric.
- Continue ironing until the flannel is wrinkle-free and smooth.
- Once ironed, let the fabric cool down before handling it to avoid any accidental burns.
Cutting And Piecing The Flannel
Whether you are preparing for a new baby or looking for a thoughtful gift, making your burp cloths from flannel is a fun and practical project. Cutting and piecing the flannel is the first step in the process and requires some careful measurement and layering to ensure a professional-looking finished product.
Measuring And Cutting
Start by measuring and cutting the flannel fabric into rectangular pieces. Use a ruler or measuring tape to mark out your desired dimensions on the fabric, ensuring that each piece is of uniform size. Then, carefully cut along the marked lines using sharp fabric scissors to ensure clean edges and precise shapes.
Layering The Flannel
Once your flannel pieces are cut, it’s time to layer them together to create the body of the burp cloth. Lay one piece of flannel flat on your work surface, then place another piece on top, aligning the edges neatly. Continue this process with additional layers if desired, securing them in place with straight pins to keep everything aligned during sewing.
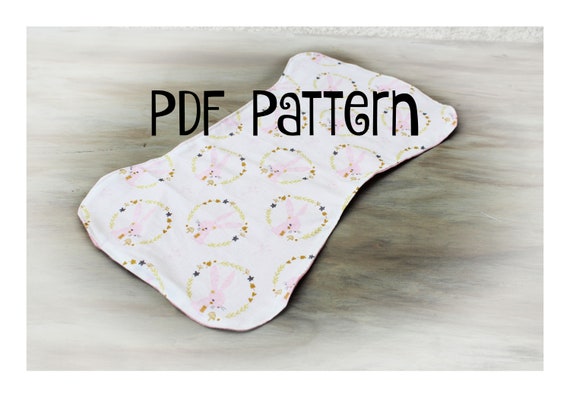
Credit: www.etsy.com
Sewing The Burp Cloth
Finishing Touches
Once you have completed the steps of cutting and sewing to make your very own burp cloths from flannel, there are a few finishing touches to add. These final touches will not only enhance the appearance of your burp cloths but also make them more functional and durable. Let’s look at two important finishing steps: trimming the edges and final washing and drying.
Trimming The Edges
After sewing the burp cloth, you will notice that the edges may be uneven or have loose threads. To give your burp cloth a clean and polished look, it’s essential to trim the edges. Use a pair of sharp fabric scissors to carefully cut off any excess material or loose threads. Be sure to cut as close to the seam as possible without cutting into the stitching. This will not only give your burp cloth a neat appearance but also prevent any potential fraying or unraveling over time.
Final Washing And Drying
Before you start using your newly made burp cloths, it’s important to give them a thorough wash. This helps to remove any dirt, dust, or residue from the fabric and ensures that they are clean and ready for use. Start by separating your burp cloths from other laundry items and place them in the washing machine. Use a mild detergent and set the machine to a gentle cycle with cold water.
Once the washing cycle is complete, transfer the burp cloths to the dryer. Set the dryer to a low heat setting to avoid damaging the flannel fabric. If possible, consider removing the burp cloths from the dryer while they are still slightly damp and let them air dry the rest of the way. This helps to minimize shrinkage and maintain the softness of the fabric.
Once your burp cloths are fully dry, they are ready to be used or gifted to someone special. Remember, burp cloths made from flannel are not only practical but also stylish. These finishing touches of trimming the edges and final washing and drying will ensure that your burp cloths are functional, durable, and aesthetically pleasing.

Credit: www.etsy.com
Frequently Asked Questions Of How To Make Burp Cloths From Flannel
How Do You Make Burp Cloths From Flannel?
To make burp cloths from flannel, you will need a piece of flannel fabric, scissors, and a sewing machine. First, cut the flannel into a rectangular shape. Then, fold the edges over and sew them to create a neat hem.
Finally, add any decorative touches or embellishments if desired.
What Is The Best Type Of Flannel Fabric To Use For Burp Cloths?
The best type of flannel fabric to use for burp cloths is one that is soft, absorbent, and durable. Look for flannel fabric made from high-quality cotton that can withstand frequent washing. It should also be thick enough to catch and absorb spit-up or drool effectively.
How Many Burp Cloths Should You Make For A Newborn?
It is recommended to have at least 5 to 7 burp cloths for a newborn. This allows you to have enough to use throughout the day and ensures you always have a clean one on hand. Newborns tend to spit up frequently, so having a good supply of burp cloths is essential.
Conclusion
Incorporating personalized burp cloths into your baby’s essentials is a creative and practical way to add a special touch to everyday items. By using soft, absorbent flannel fabric and following simple sewing instructions, you can easily create individualized burp cloths that are both stylish and functional.
With endless options for customization, making your burp cloths allows you to add a personal touch to an essential baby item, making it a unique and meaningful addition to your baby’s wardrobe. So, get your creative juices flowing and start making adorable and practical burp cloths that will make your baby the envy of the playgroup!

Hello! I’m Gobinda, the founder of this website. I’m a father to my growing child. I love the world of babies, so I started a blog about it. I want to share my fascination and help other parents.
